where I ramble on about what's happening in my little world
and hopefully you have some enjoyment reading about it!


Showing posts with label Skool of Majick. Show all posts

I made doors & I've still got all my fingers :o) or just - 'how to make doors' !

As you would expect from anything thats mine, nothing is 'normal' and all my mini doors are an odd shape &/or size! so I've had no choice but to make my own. I had been collecting coffee stirrers believing they would do the trick but they were just the wrong scale, so following much inspiration from Nina (the tudor dollshouse project), Michelle (Michelles Mad World), and Janice (on being a mini mum) & their wonderful blogs offering advice, I took the plunge, ordered some 1/4" x 1/2" balsa and set to work :o)
Firstly, I drew around the door hole to get a guide, and then started cutting the balsa to size, using a razor saw as recommended by Janice. I had no idea what a 'razor saw' actually was but was given an assortment of blades a few xmas's ago so made full use of it, experimented with all the ones with teeth, and found the perfect tool to cut with! I then scored the balsa with my modelling tool to get some deep weather grains into the 'wood' as I don't want them looking all new.
When all the pieces were cut to fit the pattern, I used Michelles tip of adding some brown paint to the PVA to colour it, as an added ageing thing; and glued all the pieces together. I had to add a coffee stirrer to each side as it wasnt quite wide enough to fit the door hole but its provided a 'frame' for the door so it worked out ok for me. The balsa didnt stick too easily so I taped it tight with lowtack tape and left it for a few hours for the PVA to dry.

I wanted my doors to look like they had iron studs on the door braces so made pilot holes using my 2mm drill bit and cut small bits of cocktail stick to dowel them together (I also glued them at the back just to be sure!) this sounded much less time consuming than cutting down real nails like Nina did!!!

Hinges.... here I nearly lost my sanity completely!!! the TINY screw/rivetty things they supply with hinges I swear are meant to drive you crazy trying to insert into the holes! LOL the balsa was simple to get them in but getting them into a coffee stirrer type strength of wood..... NO!
So, my 'Tip of the Day' is the same as yesterday's.... double sided tape again! worn over the finger tip worked a treat at keeping them where I wanted them ... which wasnt on the floor :o)

next, the brace studs got painted with black acrylic

After staining with a coat of satin walnut woodstain, I added a wash of grey acrylic and then dry brushed a bit of sap green on the edges of the doors to make it look a little mossy/mouldy like I imagine old doors to look.

Here are the finished doors for the front & upstairs back door.


adding mock strap hinges ... and a little moss to hide where the superglue leaked! and painting a little black acrylic over the TINY brass 'rivets' that I have learnt to despise more than I thought possible!

The finished door in place ... at last! & the upstairs of The Skool of Majick is now a little safer from the invasion of the dust monster.


I cannot do anymore to finish them properly yet, as I cant find my door knobs. I really, really want to finish it all :o( but I seem to have mislaid the smaller hinges that I bought as well and as you can see, the ones I have used on the other doors are just too big!!! (typical of me to now be officially un-hinged LOL) methinks I have put them in the same 'safe place' and lost them! if I cant find them, I may have to get the clay out and attempt to make some. I have the most amazing dragon door knocker to put on the front door too and cant wait to show it off :o)

right ... off to have another rummage for my sanity.

P.S. I also have to think up what to do with a bagful of spare wooden coffee stirrers!!! LOL

Photobucket

banisters & more sticky fingers

I've pulled my finger out of where-ever it was it got stuck and have been getting on with a few overdue neccessaries in the Skool of Majick :o)

As some of you may know , I don't like doing woodwork... it conjures images of splinters and chopping bits off of digits usually, so it was ignored.... until now.

Now, most normal people buy ready made stair banister railing thingies... not me, I'm a tightwad, and despite limited abilities with anything wood, thought it would be easier? better? or just cheaper, to do it meself!

marking up, for dowelling so that it stood a chance of not falling apart! I had to add a thin woodstrip at the bottom for the spindles to be glued to, to save my sanity attempting to work out how to secure them to the floor otherwise!!

I then used a 2mm drill bit, to make a hole just big enough for a bit of chopped off toothpick to be used as a fine dowel.
then the bit I dread.... whittling bits of the wood away to imitate years of knocks and general wear 'n' tear.
adding woodstain... and getting very dirty fingers, I then discovered my 'Tip of the day'...
Double-sided carpet tape!!! perfect for the spindles to stick to so they can be painted right up to the top without covering my fingers in quite so much mess :o)

it was also useful for keeping the base together whilst the glue dried.

and the end result...

it just needs some dust... no creative tip there other than to leave the roof off for a bit... it'll soon find its way in ;o)

My balsa wood arrived too , so I've also made a start on the doors... more to follow
Photobucket.

busy, sticky l'il fingers!

Hello Peeps... me again :o)

I've actually done some more work on the Skool of Majick and finally FINISHED one room!!!
I've been planning and plotting for years on how to finish it, and had originally intended on having a parquet floor... bought all the wooden pieces, got covered in wood glue, sanded it down, sanded down my fingers too, sanded a bit more and it still looked awful so I resorted to plan B, threw it out & fitted floorboards instead... much simpler, and it finally enabled me to move on!!!

(I'm sure some of you out there are thinking "Plan B? I'm suprised she even has a Plan A!")

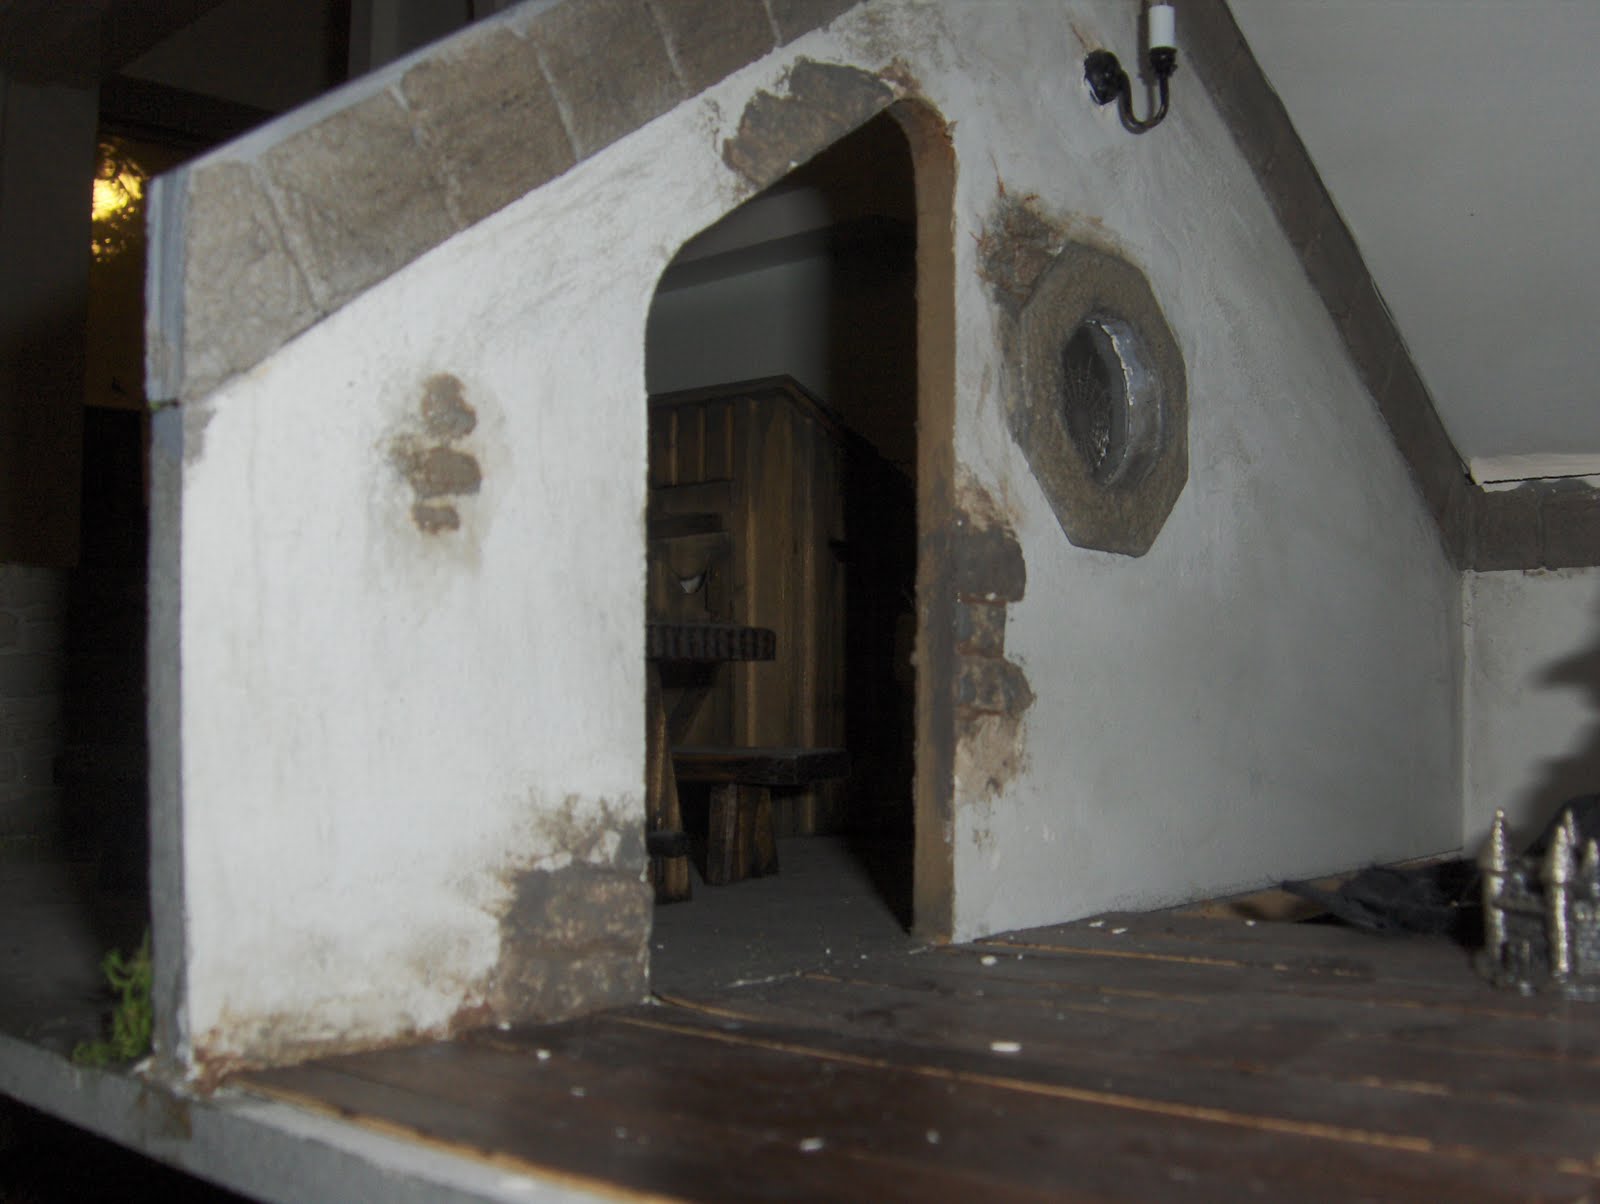
I also added paperclay stones around the doorways to add a bit of detail into the hallways & rooms... and because they are arched doorways, there was no way my woodworking skills were up to adding wooden architraving!!

First step - add a dark line into the mortar crevices.
.this is /was my palette. Normal acrylics, mid grey & earth brown, with a water to thin.


next step, applying thin, uneven layers of differing shades over the 'stones', until happy with the colouring. (this proved tricky painting in a 6" halway with an 8" brush!) Wait to dry between coats. When finished, apply a last thin coat of colour over ALL the stones, as this blends them all together. When dry, seal with a matt varnish.

Despite my woodworking skils being fairly minimal, I did however work out how to cut a nice neat angle onto the skirting at the top of the stairwell, as it is very thin and could be cut with a craft knife, so I had no worries about chopping off any digits LOL
Remember to fill in any cutlines with more stain/varnish to hide the join.

I also added some more detailing to the dormitory wall, my next challenge is to work out how to make and fit doors!!

I've been collecting those free wooden coffee stirrers for some time to try & make the doors out of, but will need a lot! This has always provoked lots of 'those' looks from my family when were out but my needs must have rubbed off on their conscience, as my daughter came home from a well known burger chain at the weekend with a nice suprise for me :o)

bless her! I still need a few hundred more tho LOL

The finished room, "Hagatha & Grumpbold's" bedroom.
Both of the dolls were made by Nicky Cooper, long before I learnt how to make anything with clay.

oops ...actually its not! now I see it in a picture, it needs something at the windows! Aaarrgghh! what do you think? more stonework around the windows, or dark curtains?... or both?
is a miniature setting ever really finished?!
Photobucket
'Oops ...... thought I'd been waiting a while, is this what it means to have a skeleton in the closet?' :o)

This is one of the trainee witch dolls I made last year for my Skool of Majick, but I can't make my mind up whether she should be a Nancy Nightshade or a Violent Violet? any other name suggestions?
(The one in the loo is Cyril, dunno why LOL)

I've been making some books today from mountcard and leather scraps, as I need loads & loads for the Skoolroom shelves, have done about 30 so far which fills about 8 inches of shelving, but.... the shelving runs the width of the room (15" wide!) and its floor to ceiling.... which means I have umpteen tons more to make, ahh the joys of mini-ing.... back to work!!

Photobucket

Hello :o)
I havn't been very productive this week, aches and pains.... I wont bore you with it all! anyway, I did do some work on the Skool of Majick in between my off colour moments and put a dirty wash over the roof to tone the grey down, and I mossed the brickwork to 'age' it all a bit. The flash makes the green stuff look a bit bright but its really not that loud.

does anyone know how to resize the pics to stop them being so huooooge when you click on them?

Next on the 'to do' list is to fit the rooftop section of the chimney, then to work out how to fit a door into the odd shaped doorway and then the roof terrace will be all done! happy days :o)


I also managed to work out how to add a signature to my blog (call me mrs technowhizz LOL) using instructions I found at the cutest blog on the block (click the name and it will take you there) I was amazed that it worked and may even try to design my own blog background and header! .... but!! its got to go on the 'to do' list cos otherwise I wont get done what needs to be done and finishing stuff has got to come first!
Photobucket

Pancakes and Progress

I hope you all remembered it's shrove Tuesday today.... or just plain old Pancake day as its known in our house! mmmmmmmmmmmmmmmmmm How do you eat yours?
My daughter made fairy cakes this afternoon too so we had quite a piggie tea today :o)
I did do some work too........
The trainees at the Skool of Majick got one step closer to getting their flying lessons today when I painted the the roof terrace paperclay floor that I added the other day.
First I painted the whole floor with a dark grey emulsion, making sure the cracks between the stones were all covered,


I then rubbed most of the paint off with a damp sponge


which as you can see still leaves the darker paint in all the dents and dips


I then applied a couple of acrylic washes of brown/grey watered down about 50/50 paint/water until I was happy with the result.

tomorrow when its good and dry, I shall seal it with a clear matt varnish. It still needs moss in the corners and up the walls etc, this I will do when the varnish has dried and add the outside loo and other bits n bobs .... oh and the last bit of chimney!
The roof tiles had their first coat of paint too, so need ageing too as theyre not staying that colour. Slowly, slowly it's all coming together :o)

Ta Da !!!! (well, almost)

I had been wanting to post a pic of my finished roof on Thursday, but ran out of clay with just 2 rows left to complete!!!!.... Grrrrr! luckily I found some online and it arrived today so that I could finish what I'd been itching to get done for months!! :o) & I have to say I was very impressed at the speed of delivery as I only ordered it on Thursday evening !! and it was free posting too, which was even better! so if anyone needs paperclay @ a good price with a quick service, I would recommend using 'the altered element' as a UK supplier.


You can see the tiles I added today as they are slightly darker where they havnt dried yet. I was suprised at how much shrinkage you get with paperclay though, and have bigger gaps than I had wanted between the tiles , but heyho.... hoping the paint will fill some gaps .... or moss.... it may be a very mossy roof, hee hee! This was my first attempt at roof tiling so even though it's far from perfect, it went better than I thought, hopefully the paint and moss will help ...... or a small miracle?
Altered Element have a blog but I can't work out how to follow it ??? maybe just me having one of my blonde/senior moments? LOL, but there was an interesting job opportunity I noticed on their blog that may appeal to some of you who are mixed media/textile/altered art/jewellery artists (UK only though I'm afraid). Not a 'proper' job as such, but sounds an interesting way of getting 'out there'. Benefits and renumeration are listed on the page here http://www.alteredelement.blogspot.com/ and no, I'm not on commission! LOL

I'm off to lay a floor on the roof terrace now, so the trainee witches can have their flying lessons. If I dont get started on it quickly, it may have to wait a while, as I helped out at my daughters school disco on Thursday evening, and I think one of the younguns may have offloaded some of their germs onto me as I have been quite snuffly & heavy headed all day, fingers crossed it doesnt linger long as I seem to have had a relatively pain-free few days and it would be such a shame to waste it by having a cold!

The roof from hell is on!!!

At long, long last the Skool of Majick's roofing problems appear to be over and I can heave a big sigh of relief! (as long as nothing else goes wrong!!!) Firstly, I had miscalculated my original design and cut the side panels a fraction too short so that when I tried to fit the original roof, it wouldnt open (..... oops!) Maths and angles were never really my strong point, I just figured I'd measure the gap, cut the wood, add the hinge, job done ...... but Oh NO!, it's never that easy is it?! , I had to add an extension to the side panels and blend it in with the original brickwork and then 'just' re-fit the roof .... 'just'.... its a small word that whenever mentioned always seem to involve many unhidden steps along the way.... well, hubbs had to come to my rescue after much huffing and cussing about cross threaded screws and hinges not closing, took the offending roof into his shed and was gone a fair while, but came back having performing some sort of majick and I now have a roof that A, fits and B, opens! :o) actually I've just noticed there is still a little bit of barge board trim I have to add to the gable end .... see, it never ends does it? LOL


next is the tiling with paperclay, I've not tried this before, so may be gone a while ........

finished fireplace :o)

I am feeling very pleased with myself, I got up this morning with a manageable 'to do' list and it has worked! AND I have finished a project that I started over a year ago!!! I made the fireback yesterday and glued it to the wall to dry, however, my heart sank when I realised that I had to paint it in situ !!! as I thought I'd make a right mess up of it, anyway , the washes ran everywhere but the end result made me smile :o)

I was then very pleased how it all fitted together. I remembered buying a cauldron crane and fire basket with spit at Miniatura, & spent a while looking for them, as they were bought so long ago I had almost forgotten where I'd stashed them! the crane swings in and out and I had the silliest grin when I showed hubby how it worked .... he gave me one of those looks, you know, like I was six or something and had assumed he's never seen one before! he just grinned back at me .... I'm so easily pleased! I have always been able to imagine exactly how the finished kitchen/spellroom is gonna look and so far its all coming together nicely :o)

Next on my 'to do' list was to hide the side panel extensions I had to add in order for the roof to fit (see previous post for explanation) these were painted and while the paint dried I fitted the outside coach lamp. Then the brick compound was added using a quoin stone stencil from Bromley craft products. I had to put it on, and then re-use the stencil again the other way up to get even blocks as its designed for the edges of houses rather than how I decided to use it! The wooden strip has been hidden so I'm happy :o)

Tomorrow the roof goes on!!!! I have waited for sooooooo long for the roof to go on! :o)
Not bad for a days work if I say so myself!

I've just noticed that I seem to have aquired lots more followers in the last few days, so a big Hello and welcome to my waffling!!! when I get a chance, I will have a look at all your blogs, but right now I'm going to sit down and enjoy (hopefully) watching England play Rugby on the telly :o)

chimneys and roofing problems!

Yesterday I had a poorly day but by the evening I 'woke' up a bit and got the paperclay out, & thankfully today is a good day too :o) A while ago, I made chimneys for Hagathas Skool of majick from offcuts of MDF but only got around to paperclaying one of them, so last night I fixed that! I also realised that I had forgotten to stipple the clay with a brush for texture on the earlier chimney, so although they have similar colourings the textures are different......
am trying to decide if I can live with this error or add it back onto my neverending 'to do' list!

The larger one is going in the kitchen/spellroom and the smaller (smoother) one is the lounge fireplace. I made a fireback for the kitchen fireplace this morning, but it's not dry enough to paint yet, I shall do that this evening hopefully and then I can sooty them up and fit them tomorrow :o)

My hubby suprised me this morning by offering to finally solve the roofing problems I'd been having due to my huooooge measuring error when I planned the house, which is why it has been roofless for so long as when I originally tried fitting the roof, it wouldn't open because the doors were in the way!!! this has caused much sulking and frustration on my part! anyway, hubbs had an idea & solved this ongoing problem today with the majick of 'no nails' glue! he glued a strip around the edge which should give me the clearance to be able to open it and actually access the roof room :o) The wood will be covered up with more brickwork/clay so it wont be seen.

Apparently it needs a good 24 hrs to set firm so I doubt anything new will happen now until Sunday, as Im booked up for tomorrow already (I am really trying hard not to overload myself anymore), but fingers crossed the glue will work and I can get the roof on next week :o)
I'll keep you all posted on any progress.
xxx


Introducing my houses

Well, I did say I wasnt going to blog for a while, but decided I had been wallowing in gloom for far too long and had to pull my finger out from wherever it was stuck and get on with 'stuff'! I will probably still have more off days than good ones, but at least I will feel like Ive occasionally acheived something!
So ...... hubby obligingly helped shift tons of my 'stuff' about and totally reorganised my workroom so that I now have some space to work on my two neglected dollshouses :o)
this is 'Hagathas Skool of Majick & Witchery' which I made from my own plans a few years ago & never finished


and this is my newest house, it's going to be Santa'sToyshop
(I bought this over a year ago and all it's done since is gather dust!)

I have an awful habit of starting things, then starting more things and never actually finishing ANYTHING! which sort of perpetuates my feelings of inadequacy, so I thought I had best do something positive to change these feelings. I still may not finish anything very quickly, but by putting it all on the blog, I can maybe give myself a nudge to do a bit more every know and then, after all, not much point making dolls that have nowhere to live, right?
anyway, I made a start on the santa house by decorating the main 'Toyshop' room. I couldn't find any wallpaper I liked, so scanned in some xmassy holly fabric from my stash and printed it out onto paper.


I need to paint the window frames and fit the glass next I think as I want to get the room finished as soon as I can so that its an incentive to do something to the rest of the house.
I've taken lots of pics of things to add to the blog but will leave it here for now, Id love to hear any ideas about colours for the front of the house, as I dont really know what I want to do to it , other than put paperclay tiles on the roof and have the sides of the building (which are plain) have some exposed brickwork showing through cracked and crumbling plaster ....... I just need to learn the skills and find the time to do it!